Pages

Friday 28 June 2013

Toddler booster seat

Miss S has hit that toddler age - she knows her mind and shares it willingly and sometimes forcefully. This morning we had a huge discussion about what to wear - she insisted on the "butterfly" dress which turned out to be a plain blue skirt with one random and obscure butterfly embroided on the back - I didn't even know the butterfly was there! Anyway, these opinions also shared about food. After one evening which I have since labelled the "chicken meltdown" (how dare you Mummy feed me plain chicken and rice) we have started eating dinner as a family. Miss S now willingly eats whatever we eat - phew! Anyway, such a long convoluted start to the fact that we now need a booster seat at the table for Miss S to eat with us.
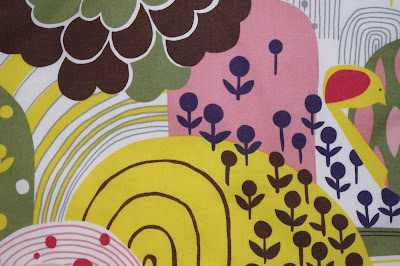
Inspired by this fabric:

And this tutorial from Prudent baby, I have decided to have a go myself. I am thinking removable cover, square shape with piping and a seat tie - I will keep you posted.

Thursday 20 June 2013

Winter Jacket


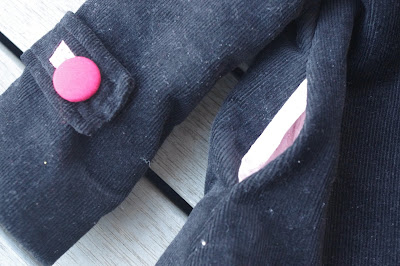
The days are quickly getting cooler and shorter here in Melbourne and with that comes a need for a warm winter jacket for Miss S. I made a lovely navy blue version of this pattern for her last year and I had some improvements for this year's jacket. The pattern and instructions are spot on but I was unimpressed with the buttonholes I created on last year's jacket (nothing to do with the pattern - more the fault of the operator). After my first attempt at bound buttonholes for the pram seat liner I decided to use them again on the jacket. I also added some pockets in the side seams and created some facing panels - all easy alterations but improved the functionality of the jacket. I am pretty pleased with the result - think Miss S is too!


I added a pleat in the back for more ease - I think it give the coat a nice A-line look as well.

As well as bound button holes I drafted some facing panels for the lining.

A close up of those bound button holes

Pockets in the side seams for storing little treasures - Miss S loves picking up small stones so a great place to store them.


Wednesday 5 June 2013

Baby Carrier

This project is super easy and will take you no time at all!

You will need:

  • 0.6 m stretch cotton sateen (this is usually 95% cotton and 5% lyrcra or spandex - it has a nice slight stretch across the grain and is a little thicker than regular cotton fabric)
  • thread
  • a small amount of stuffing - really this is not totally necessary but it does make a bit more comfy for bubs


You are basically using the whole piece of fabric, on the fold and cutting a curve along the non-folded edges. You will have one piece (60cm high x the width of the fabric) which you will join together to form one loop of fabric. To do this you could use a regular seam but for extra strength and a neat finish I used a french seam - easy, just follow the steps below.


You should now have a loop of fabric joined by the french seam. Follow these steps below to finish your carrier.


This will create a nice comfy edge along half of your carrier for bubs to rest against.


Finished!

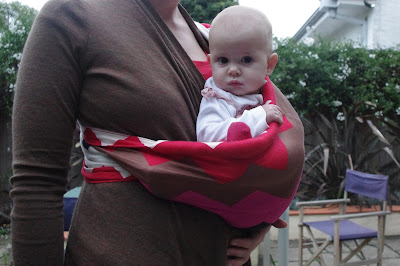
To wear, sling the carrier diagonally over one shoulder- the padded edge to the front. Open a pocket for bubs to sit in - their bottom will sit in the curved french seam (another reason for making this seam nice and strong). Move bubs about until they are comfy - I have found that when they are little, bubs can curl in nicely and fall asleep.


I have even managed to use it for Miss S to support her when carried on my hip - it sure does save lots of tired arms!